Phaser 4 Isometric Minesweeper 6편 — localStorage 기록 저장으로 마무리하기
Isometric Minesweeper에 난이도별 최고 기록 저장, Best 표시, New best 상태, 기록 초기화 버튼을 추가하고 이번 지뢰찾기 연재를 마무리했습니다.
지난 글에서는 Isometric Minesweeper에 빈 칸 연쇄 오픈과 새 게임 흐름을 넣었다.
그때까지 구현한 내용은 다음과 같았다.
이 정도면 규칙만 놓고 봤을 때는 꽤 지뢰찾기다워졌다.
하지만 실제로 플레이해보면 아직 데모 냄새가 강했다.
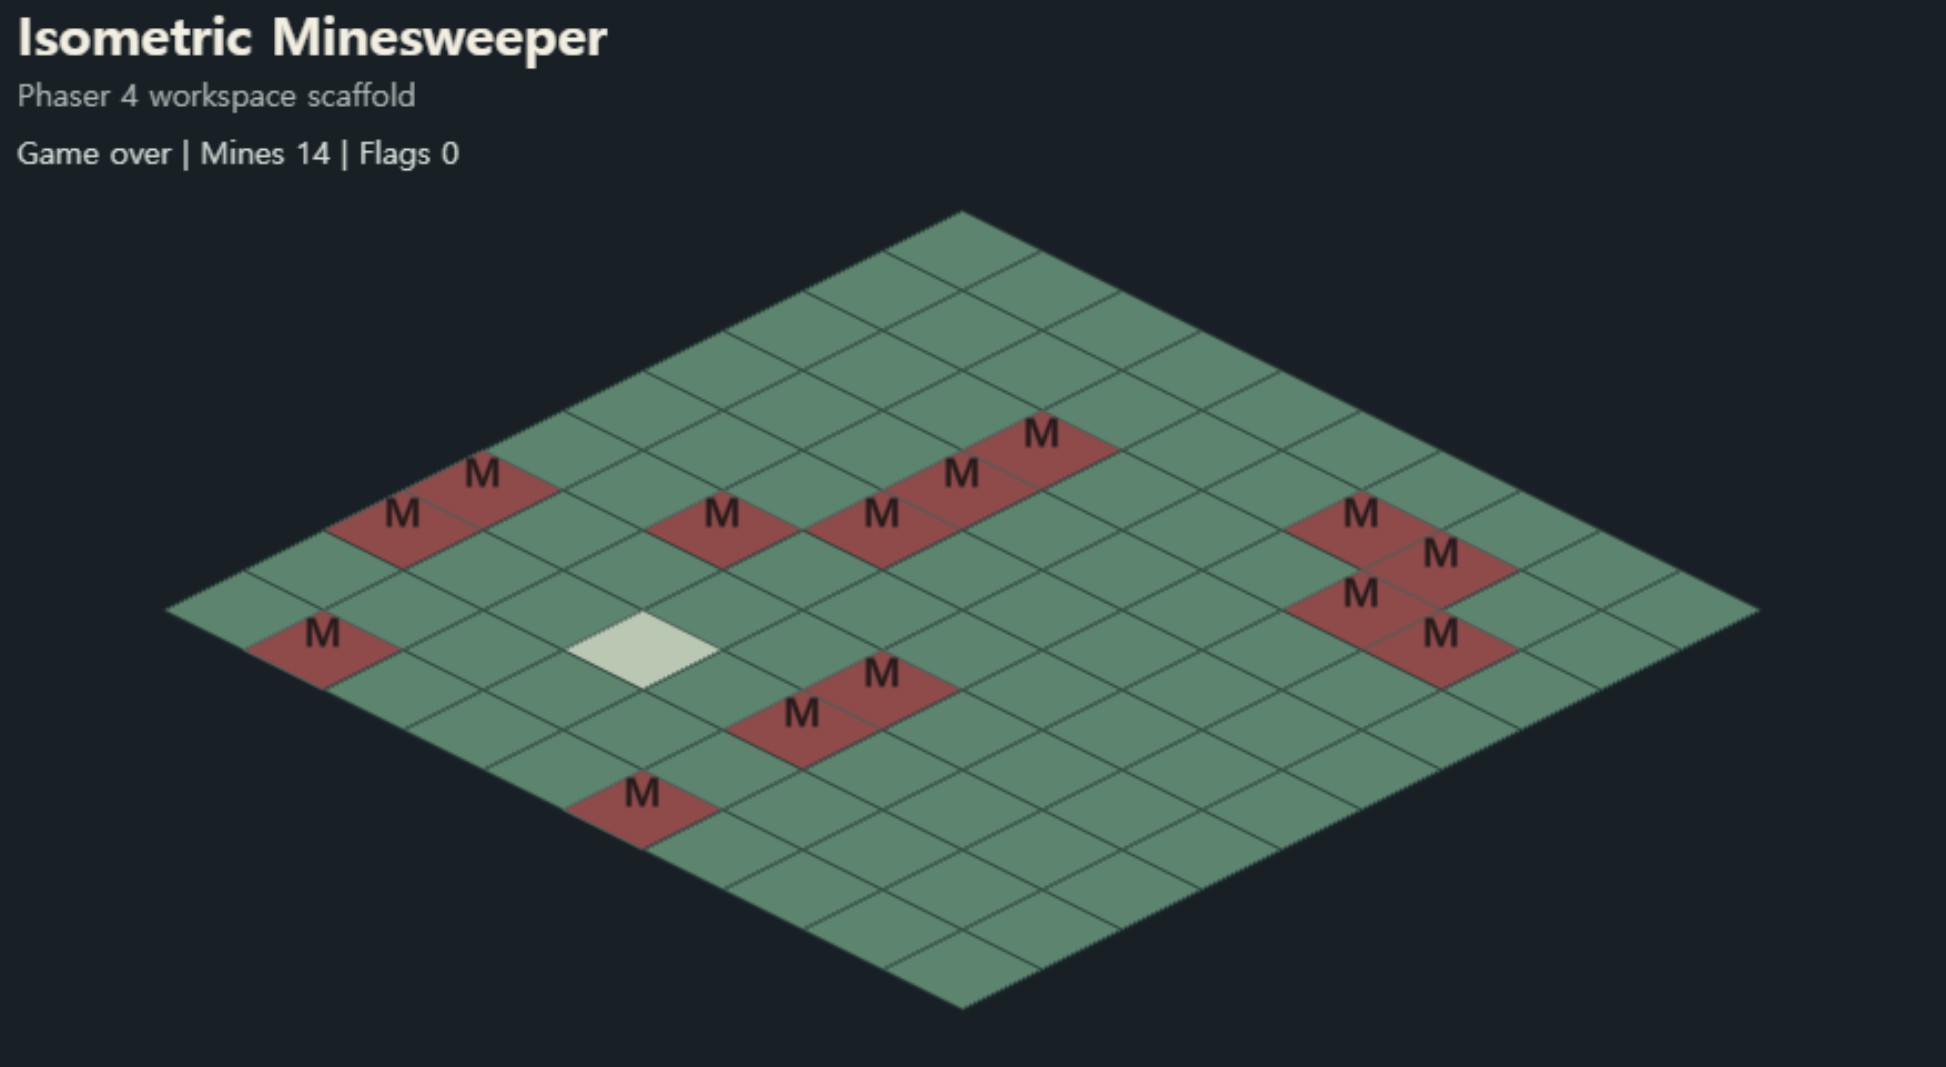
보드는 항상 10x10이었고, 시간도 없었고, 깃발과 지뢰는 F, M 텍스트로 표시했다.
기능은 있는데 게임처럼 보이지는 않았다.
그래서 이번에는 두 방향을 같이 진행했다.
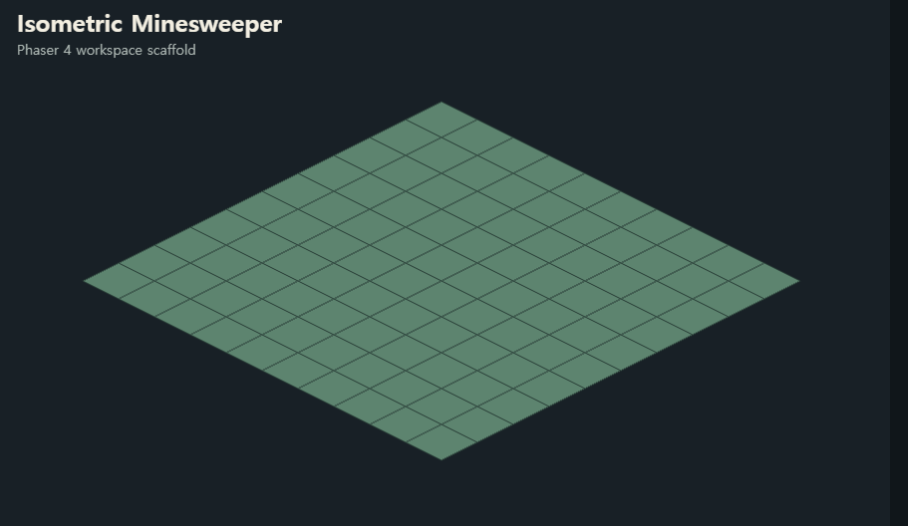
현재 데모는 아래에서 볼 수 있다.
이번 구현 범위는 다음과 같다.
처음에는 난이도와 타이머만 넣으려고 했다.
그런데 막상 구현해보니 블로그 한 편으로 쓰기에는 조금 얇았다. 기능적으로는 중요하지만, 화면 변화는 버튼과 시간 표시 정도였기 때문이다.
그래서 렌더링 polish 1차까지 묶었다.
이번 글의 주제는 “작동하는 지뢰찾기”를 “플레이하고 싶은 지뢰찾기” 쪽으로 한 번 밀어보는 것이다.
지금까지 보드 크기와 지뢰 수는 상수였다.
export const BOARD_WIDTH = 10;
export const BOARD_HEIGHT = 10;
export const MINE_COUNT = 14;
처음 구현할 때는 이게 편하다.
하지만 난이도 선택이 들어오면 보드 크기와 지뢰 수가 한 묶음으로 움직여야 한다.
그래서 DifficultyConfig를 추가했다.
export type DifficultyId = 'beginner' | 'standard' | 'expert';

export type DifficultyConfig = {
    boardHeight: number;
    boardWidth: number;
    id: DifficultyId;
    label: string;
    mineCount: number;
};

export const DIFFICULTIES: DifficultyConfig[] = [
    {
        boardHeight: 8,
        boardWidth: 8,
        id: 'beginner',
        label: 'Beginner',
        mineCount: 10,
    },
    {
        boardHeight: BOARD_HEIGHT,
        boardWidth: BOARD_WIDTH,
        id: 'standard',
        label: 'Standard',
        mineCount: MINE_COUNT,
    },
    {
        boardHeight: 14,
        boardWidth: 14,
        id: 'expert',
        label: 'Expert',
        mineCount: 32,
    },
];
현재는 세 단계만 넣었다.
윈도우 지뢰찾기의 전통적인 난이도와 정확히 같지는 않다.
이 게임은 isometric 화면이라 보드가 정사각형으로 커질수록 가로 폭이 빨리 넓어진다. 그래서 현재 iframe 크기에서 무리 없이 보이는 범위로 먼저 잡았다.
기존 createBoardLayout은 viewport width만 받았다.
export function createBoardLayout(viewportWidth: number): BoardLayout {
    return {
        boardHeight: BOARD_HEIGHT,
        boardWidth: BOARD_WIDTH,
        mineCount: MINE_COUNT,
        originX: viewportWidth / 2,
        originY: BOARD_ORIGIN_Y,
        tileHeight: TILE_HEIGHT,
        tileWidth: TILE_WIDTH,
    };
}
이제는 난이도를 받아서 보드 크기와 지뢰 수를 결정한다.
export function createBoardLayout(
    viewportWidth: number,
    difficulty: DifficultyConfig = DIFFICULTIES[1],
): BoardLayout {
    const maxTileWidth = Math.floor((viewportWidth - 72) / difficulty.boardWidth);
    const tileWidth = Math.max(46, Math.min(TILE_WIDTH, maxTileWidth));
    const tileHeight = Math.round(tileWidth / 2);

    return {
        boardHeight: difficulty.boardHeight,
        boardWidth: difficulty.boardWidth,
        difficulty,
        hoverInset: HOVER_INSET,
        mineCount: difficulty.mineCount,
        originX: viewportWidth / 2,
        originY: BOARD_ORIGIN_Y,
        tileHeight,
        tileWidth,
    };
}
여기서 같이 처리한 것이 타일 크기다.
보드가 14x14가 되면 기존 72px 타일로는 화면에 꽉 차거나 넘칠 수 있다.
그래서 viewportWidth와 boardWidth를 기준으로 최대 타일 크기를 계산했다.
const maxTileWidth = Math.floor((viewportWidth - 72) / difficulty.boardWidth);
const tileWidth = Math.max(46, Math.min(TILE_WIDTH, maxTileWidth));
const tileHeight = Math.round(tileWidth / 2);
최대 크기는 기존 TILE_WIDTH를 넘지 않게 하고, 너무 작아지지 않도록 최소값은 46px로 막았다.
아직 완전한 반응형 대응은 아니다.
브라우저 resize 이벤트를 처리하지 않고, 시작 시점의 scale width를 기준으로 보드를 만든다. 그래도 난이도 변경에 따라 보드가 화면 밖으로 튀어나가는 문제는 줄일 수 있다.
난이도는 게임 규칙 그 자체라기보다는 현재 플레이 세션의 설정에 가깝다.
그래서 World에 넣지 않고 Phaser Scene이 들고 있게 했다.
class BootScene extends Phaser.Scene {
    private boardLayout!: BoardLayout;
    private difficulty: DifficultyConfig = DIFFICULTIES[1];
    private difficultyButtons: Phaser.GameObjects.Text[] = [];
    private world: World = createWorld();
}
새 게임을 시작할 때는 현재 난이도는 유지하고 World만 새로 만든다.
private resetGame() {
    this.resetTimer();
    this.world = createWorld();
    createBoardSystem(this.world, this.boardLayout);
    this.renderGame();
}
난이도를 바꿀 때는 difficulty와 boardLayout을 바꾼 뒤 같은 reset 흐름을 탄다.
private setDifficulty(difficulty: DifficultyConfig) {
    if (this.difficulty.id === difficulty.id) return;

    this.difficulty = difficulty;
    this.boardLayout = createBoardLayout(this.scale.width, difficulty);
    this.updateDifficultyButtons();
    this.resetGame();
}
이렇게 해두면 새 게임과 난이도 변경이 거의 같은 길을 지나간다.
차이는 난이도 변경에서는 layout을 먼저 다시 만든다는 것뿐이다.
타이머는 언제 시작해야 할까?
페이지가 열리자마자 시작하면 사용자가 난이도를 고르거나 화면을 보는 시간까지 포함된다.
지뢰찾기에서는 보통 첫 클릭부터 시간을 잰다.
그래서 revealTileSystem이 처음으로 지뢰밭을 준비한 직후 타이머를 시작하도록 했다.
입력 처리 쪽에서는 클릭 전 상태를 기억해둔다.
const previousStatus = this.world.resources.gameStatus;
const result =
    pointer.rightButtonDown() || pointer.button === 2
        ? toggleFlagSystem(this.world, hoveredTile)
        : revealTileSystem(this.world, hoveredTile, this.boardLayout);

if (!result.changed) return;

this.syncTimerAfterAction(previousStatus);
this.renderGame();
그리고 action 이후 상태를 보고 타이머를 동기화한다.
private syncTimerAfterAction(previousStatus: string) {
    if (
        previousStatus === 'ready' &&
        this.world.resources.minefieldReady &&
        this.timerStartedAt === null
    ) {
        this.startTimer();
    }

    if (
        this.world.resources.gameStatus === 'won' ||
        this.world.resources.gameStatus === 'lost'
    ) {
        this.stopTimer();
    }
}
첫 reveal 전 상태가 ready였고, action 이후 minefieldReady가 true가 되었다면 그 클릭이 첫 reveal이다.
그때 타이머를 시작한다.
반대로 게임 상태가 won 또는 lost가 되면 타이머를 멈춘다.
타이머 상태는 두 값으로 관리했다.
private elapsedSeconds = 0;
private timerStartedAt: number | null = null;timerStartedAt이 있으면 현재 플레이 중이고, 없으면 타이머가 멈춘 상태다.
private getElapsedSeconds() {
    if (this.timerStartedAt === null) return this.elapsedSeconds;

    return Math.floor((this.time.now - this.timerStartedAt) / 1000);
}
게임이 끝나면 현재 값을 elapsedSeconds에 고정하고 timerStartedAt을 비운다.
private stopTimer() {
    this.elapsedSeconds = this.getElapsedSeconds();
    this.timerStartedAt = null;
}
새 게임을 시작하거나 난이도를 바꾸면 둘 다 초기화한다.
private resetTimer() {
    this.elapsedSeconds = 0;
    this.timerStartedAt = null;
}
이 구조는 나중에 localStorage 기록 저장으로 이어가기 좋다.
게임이 끝났을 때 elapsedSeconds와 difficulty.id를 같이 저장하면 난이도별 최고 기록을 만들 수 있다.
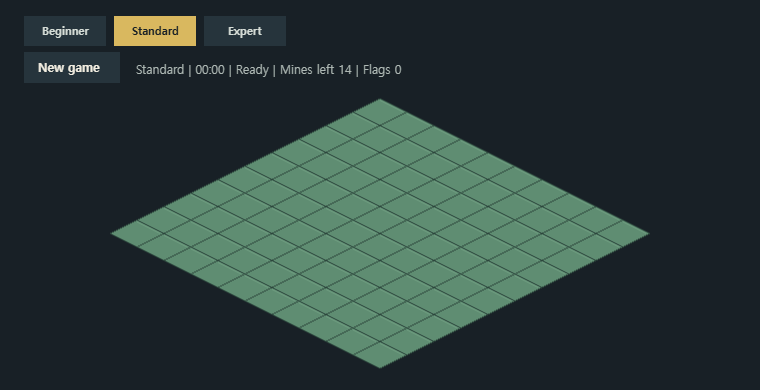
난이도 버튼과 새 게임 버튼은 아직 Phaser Text로 만들었다.
this.difficultyButtons = DIFFICULTIES.map((difficulty, index) =>
    this.add
        .text(486 + index * 94, 24, difficulty.label, {
            align: 'center',
            backgroundColor: '#26343c',
            color: '#d7ded8',
            fixedWidth: 86,
            fontFamily: 'system-ui, sans-serif',
            fontSize: '12px',
            fontStyle: '700',
            padding: {
                bottom: 8,
                left: 8,
                right: 8,
                top: 8,
            },
        })
        .setDepth(10)
        .setInteractive({ useHandCursor: true })
        .on('pointerdown', () => {
            this.setDifficulty(difficulty);
        }),
);
선택된 난이도는 배경색과 글자색을 바꿔 표시한다.
private updateDifficultyButtons() {
    this.difficultyButtons.forEach((button, index) => {
        const selected = DIFFICULTIES[index].id === this.difficulty.id;

        button.setStyle({
            backgroundColor: selected ? '#d9b85f' : '#26343c',
            color: selected ? '#182026' : '#d7ded8',
        });
    });
}
지금 단계에서는 충분하다.
다만 UI가 조금씩 늘어나고 있으니, 다음에 모바일 대응을 할 때는 HUD 영역을 따로 정리해야 할 것 같다.
현재는 버튼 위치가 고정 좌표라 작은 화면에서는 답답해질 수 있다.
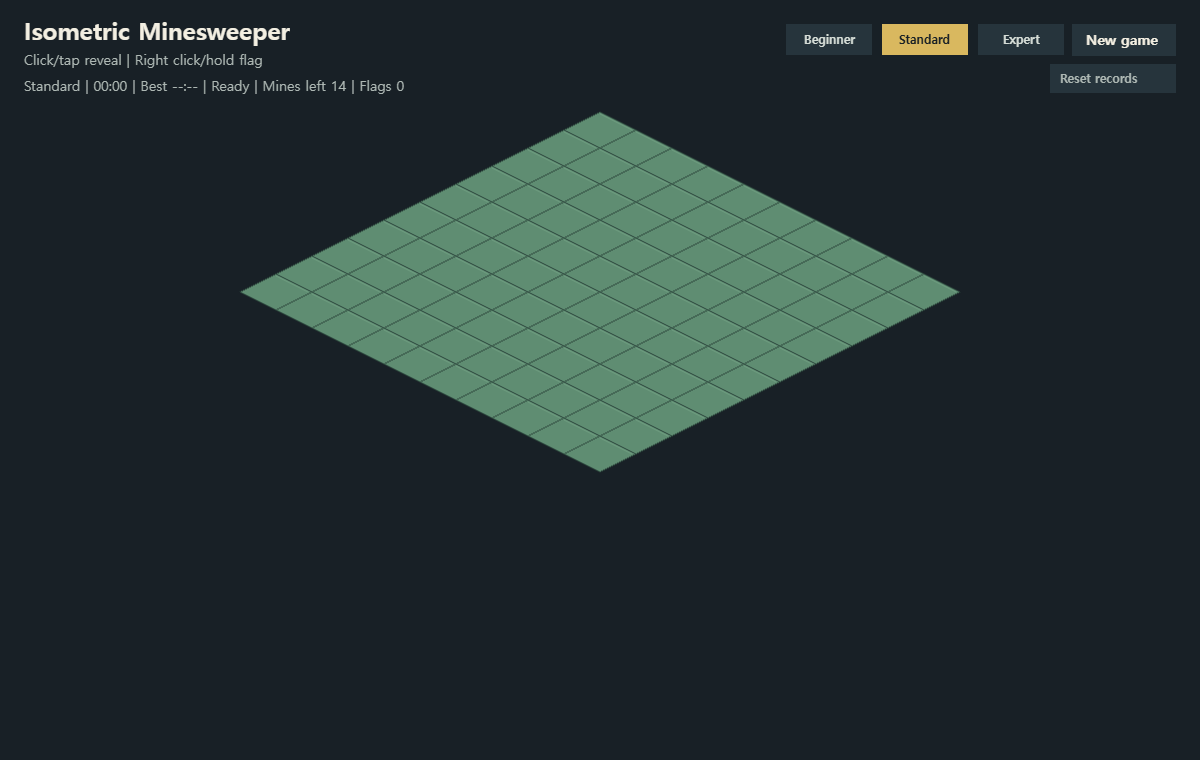
상단 상태 문구에는 난이도, 시간, 게임 상태, 남은 지뢰 수, flag 수를 같이 표시했다.
private getStatusText() {
const flagCount = this.world.flags.size;
const minesLeft = getMinesLeft(this.world, this.boardLayout);
const elapsedTime = this.formatElapsedTime();
const prefix = `${this.difficulty.label} | ${elapsedTime}`;
if (this.world.resources.gameStatus === 'ready') {
return `${prefix} | Ready | Mines left ${minesLeft} | Flags ${flagCount}`;
}
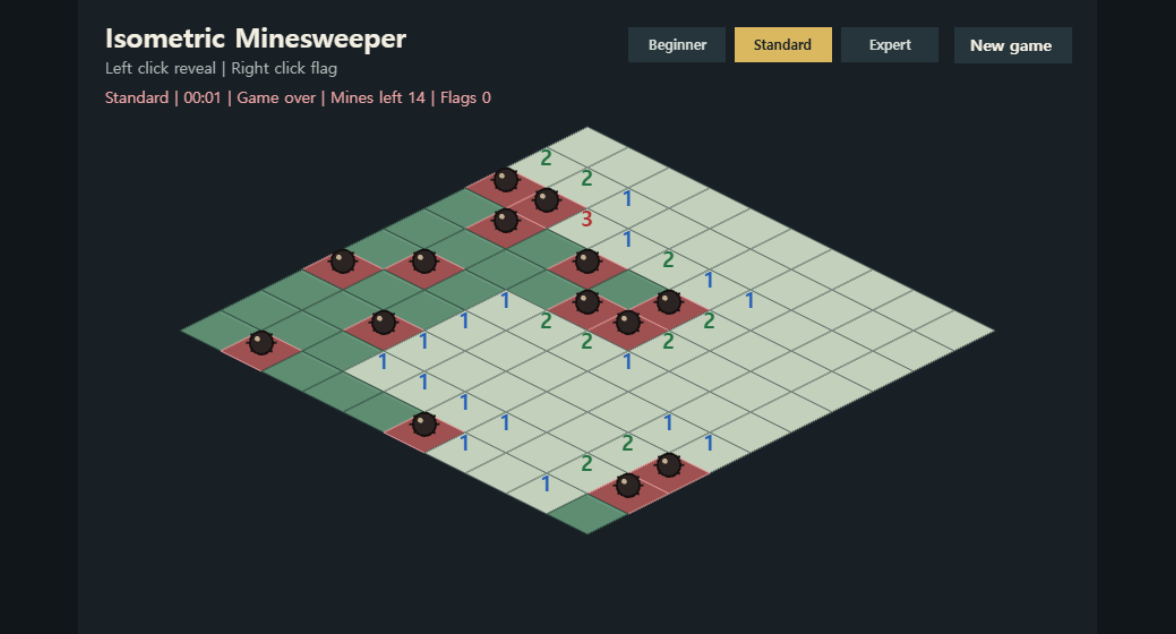
if (this.world.resources.gameStatus === 'lost') {
return `${prefix} | Game over | Mines left ${minesLeft} | Flags ${flagCount}`;
}
if (this.world.resources.gameStatus === 'won') {
return `${prefix} | Clear | Mines left ${minesLeft} | Flags ${flagCount}`;
}
return `${prefix} | Playing | Mines left ${minesLeft} | Flags ${flagCount}`;
}상태에 따라 색도 바꿨다.
private getStatusColor() {
    if (this.world.resources.gameStatus === 'lost') return '#f0a6a6';
    if (this.world.resources.gameStatus === 'won') return '#f3d36b';
    if (this.world.resources.gameStatus === 'playing') return '#d7ded8';

    return '#aeb8b4';
}
작은 변화지만 체감이 있다.
패배했을 때는 붉은색, 클리어했을 때는 노란색으로 바뀌어 게임이 끝났다는 느낌이 더 명확해졌다.
지난 구현에서는 깃발과 지뢰를 텍스트로 표시했다.
if (!revealed) return world.flags.has(entityId) ? 'F' : '';
if (world.mines.has(entityId)) return 'M';
기능 확인에는 충분했다.
하지만 화면에 F, M이 떠 있는 순간 아무래도 프로토타입처럼 보인다.
이번에는 숫자만 텍스트로 남기고, 깃발과 지뢰는 Phaser Graphics로 직접 그렸다.
그래서 tile content 렌더링 상태를 아래처럼 분리했다.
export type TileContentRenderState = {
    graphics: Phaser.GameObjects.Graphics;
    labels: Phaser.GameObjects.Text[];
};
숫자는 매번 Text object를 새로 만들고, 깃발/지뢰는 하나의 Graphics layer에 그린다.
export function renderTileContentSystem(
    world: World,
    scene: Phaser.Scene,
    previousState: TileContentRenderState,
    layout: BoardLayout,
) {
    previousState.labels.forEach((label) => label.destroy());
    previousState.graphics.clear();

    const nextLabels: Phaser.GameObjects.Text[] = [];

    getRenderableEntities(world).forEach((entityId) => {
        const render = world.renders.get(entityId);
        const tile = world.tiles.get(entityId);
        if (!render || !tile) return;

        if (!tile.revealed && world.flags.has(entityId)) {
            drawFlagIcon(
                previousState.graphics,
                render.screenX,
                render.screenY,
                layout,
            );
            return;
        }

        if (tile.revealed && world.mines.has(entityId)) {
            drawMineIcon(
                previousState.graphics,
                render.screenX,
                render.screenY,
                layout,
            );
            return;
        }

        const labelText = getTileLabel(world, entityId, tile.revealed);
        if (!labelText) return;

        // 숫자 Text 생성
    });

    return {
        graphics: previousState.graphics,
        labels: nextLabels,
    };
}
여기서 중요한 변화는 content layer의 책임이 둘로 나뉜 점이다.
이렇게 해두면 나중에 sprite atlas로 바꿀 때도 경로가 보인다.
drawFlagIcon, drawMineIcon만 sprite 생성으로 바꾸면 된다.
깃발은 간단한 선과 삼각형으로 그렸다.
function drawFlagIcon(
    graphics: Phaser.GameObjects.Graphics,
    x: number,
    y: number,
    layout: BoardLayout,
) {
    const poleHeight = layout.tileHeight * 0.72;
    const poleTop = y - layout.tileHeight * 0.56;
    const poleBottom = poleTop + poleHeight;
    const flagWidth = layout.tileWidth * 0.24;
    const flagHeight = layout.tileHeight * 0.34;

    graphics.lineStyle(3, 0x253238, 1);
    graphics.beginPath();
    graphics.moveTo(x - 4, poleTop);
    graphics.lineTo(x - 4, poleBottom);
    graphics.strokePath();

    graphics.fillStyle(0xf2c94c, 1);
    graphics.lineStyle(1, 0x815f16, 1);
    graphics.beginPath();
    graphics.moveTo(x - 2, poleTop + 2);
    graphics.lineTo(x + flagWidth, poleTop + flagHeight * 0.45);
    graphics.lineTo(x - 2, poleTop + flagHeight);
    graphics.closePath();
    graphics.fillPath();
    graphics.strokePath();
}
좌표는 타일 중심을 기준으로 살짝 위에 잡았다.
isometric 타일은 화면상 높이가 낮기 때문에, 아이콘을 정중앙에 두면 아래쪽이 답답해 보인다.
그래서 y - layout.tileHeight * 0.56 근처에서 깃대가 시작되게 했다.
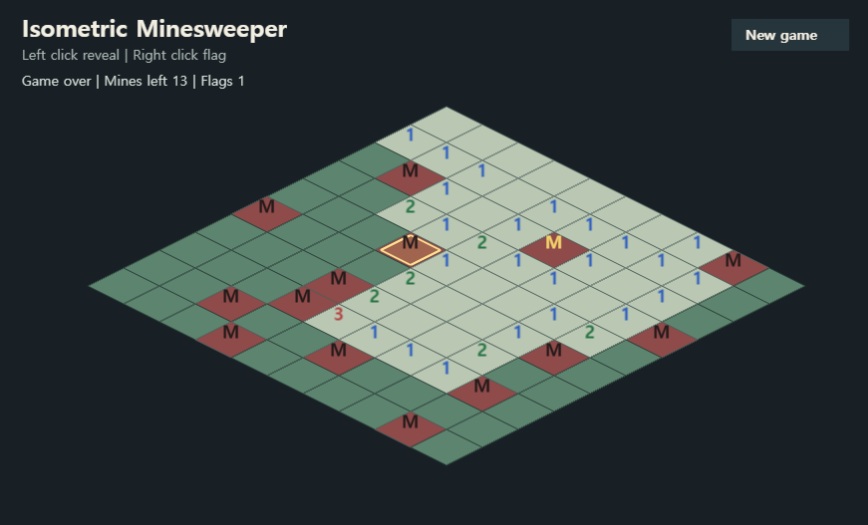
지뢰는 원 하나만 그리면 조금 심심하다.
그래서 중심 원을 그리고, 8방향으로 짧은 선을 뻗었다.
function drawMineIcon(
    graphics: Phaser.GameObjects.Graphics,
    x: number,
    y: number,
    layout: BoardLayout,
) {
    const radius = Math.max(7, layout.tileWidth * 0.14);
    const centerY = y - layout.tileHeight * 0.2;

    graphics.lineStyle(2, 0x1f1717, 1);
    for (let index = 0; index < 8; index += 1) {
        const angle = (Math.PI * 2 * index) / 8;
        const innerX = x + Math.cos(angle) * (radius * 0.7);
        const innerY = centerY + Math.sin(angle) * (radius * 0.7);
        const outerX = x + Math.cos(angle) * (radius * 1.35);
        const outerY = centerY + Math.sin(angle) * (radius * 1.1);

        graphics.beginPath();
        graphics.moveTo(innerX, innerY);
        graphics.lineTo(outerX, outerY);
        graphics.strokePath();
    }

    graphics.fillStyle(0x2b2423, 1);
    graphics.lineStyle(2, 0x14100f, 1);
    graphics.fillCircle(x, centerY, radius);
    graphics.strokeCircle(x, centerY, radius);
}
정교한 sprite는 아니지만 M 텍스트보다는 훨씬 낫다.
무엇보다 외부 asset 없이 코드만으로 처리할 수 있어서, 이번 글의 범위에 잘 맞았다.
난이도가 생기면서 타일 크기가 변한다.
그러면 숫자 크기도 고정 18px로 두기 애매하다.
그래서 타일 폭에 맞춰 숫자 크기를 계산했다.
const label = scene.add
    .text(render.screenX, render.screenY - layout.tileHeight * 0.25, labelText, {
        align: 'center',
        color: getTileLabelColor(world, entityId),
        fontFamily: 'system-ui, sans-serif',
        fontSize: `${Math.max(15, Math.floor(layout.tileWidth * 0.27))}px`,
        fontStyle: '800',
    })
    .setDepth(6)
    .setOrigin(0.5);
타일이 작아져도 최소 15px은 유지하고, 기본 크기에서는 19px 정도가 된다.
숫자 위치도 중앙보다 살짝 위로 올렸다.
render.screenY - layout.tileHeight * 0.25;isometric 타일은 시각적으로 위쪽 면에 내용이 올라간 것처럼 보여야 자연스럽다.
그래서 텍스트를 다이아몬드 중앙보다 조금 위에 놓았다.
렌더링 polish의 큰 부분은 색상이다.
현재 타일은 상태에 따라 다른 fill과 stroke를 사용한다.
function getTileFill(
    world: World,
    entityId: number,
    revealed: boolean,
    mineRevealed: boolean,
) {
    if (mineRevealed)
        return world.resources.gameStatus === 'lost' ? 0x9f5050 : 0x776b60;
    if (revealed) return 0xc3d0bc;
    if (world.flags.has(entityId)) return 0x5f7780;

    return 0x5f8d72;
}
열리지 않은 기본 타일은 녹색 계열로 두고, 열린 타일은 밝은 회색-녹색으로 뺐다.
flag가 꽂힌 타일은 조금 더 푸른색으로 바꿔 구분했다.
지뢰가 드러났을 때는 게임 패배 상태라면 붉은색으로 보여준다.
function getTileStroke(
    world: World,
    entityId: number,
    revealed: boolean,
    mineRevealed: boolean,
) {
    if (mineRevealed)
        return world.resources.gameStatus === 'lost' ? 0xe0a0a0 : 0x4e4944;
    if (world.flags.has(entityId)) return 0xaec6c9;
    if (revealed) return 0x53645e;

    return 0x2c463c;
}
단순히 색을 예쁘게 바꾸는 것보다 중요한 것은 상태 차이가 빨리 읽히는 것이다.
지뢰찾기는 한눈에 많은 칸을 훑어야 하는 게임이라, 닫힌 칸과 열린 칸이 확실히 달라야 한다.
이번 구현으로 게임이 조금 더 그럴듯해졌다.
하지만 아직 완성이라고 하기에는 남은 것이 많다.
특히 다음에 하고 싶은 것은 모바일 대응이다.
지금은 우클릭으로 flag를 꽂는다. 데스크톱에서는 괜찮지만, 모바일에서는 입력 방법이 없다.
long press로 flag를 꽂고, 일반 tap으로 reveal하는 흐름을 만들어야 실제로 블로그 iframe 안에서 편하게 플레이할 수 있다.
이번 구현은 지뢰찾기의 규칙을 크게 바꾸지는 않았다.
대신 게임의 껍질을 조금 더 게임답게 만들었다.
난이도 선택이 들어오면서 보드 layout이 설정에 따라 바뀌기 시작했고, 타이머가 들어오면서 플레이 세션이라는 개념이 생겼다.
그리고 F, M 텍스트를 없애고 깃발과 지뢰를 직접 그리면서 화면의 프로토타입 느낌이 조금 줄었다.
아직 작은 웹게임이지만, 이제는 “규칙이 동작하는 데모”에서 “조금씩 완성되어 가는 게임”으로 넘어가는 느낌이 든다.
다음에는 모바일 입력과 반응형 layout을 다뤄볼 생각이다.
Isometric Minesweeper에 난이도별 최고 기록 저장, Best 표시, New best 상태, 기록 초기화 버튼을 추가하고 이번 지뢰찾기 연재를 마무리했습니다.
블로그 iframe 안에서 Isometric Minesweeper를 모바일로 플레이할 수 있도록 tap reveal, long press flag, landscape 안내, height 기반 board layout을 추가했습니다.
지뢰찾기의 손맛을 만드는 빈 칸 연쇄 오픈을 BFS로 구현하고, 새 게임 버튼과 남은 지뢰 수 UI를 추가했습니다.
ECS scaffold 위에 지뢰찾기 규칙을 얹어 Mine, Flag, AdjacentMineCount 상태를 추가하고, 첫 클릭 이후 지뢰를 배치하는 흐름을 구현했습니다.
Phaser 4 기반 웹게임을 블로그에서 iframe으로 서비스하기 위한 첫 실험으로, Isometric Minesweeper의 ECS scaffold와 isometric 타일 hover 문제를 정리했습니다.

Phaser 3의 Scene 중심 Player 코드를 Phaser 4 ECS 스타일로 옮기는 과정을 실전 예시로 정리했습니다. 이동, 점프, 공격 로직을 단계별로 변환해봅니다.